VANDA-LAY INDUSTRIES
P.O.BOX 1945 RUNNING SPRINGS,CALIFORNIA 92382
EMAIL: vdl3@verizon.net PHONE : 909-744-4445
|
|||||||
|
VANDA-LAY INDUSTRIES |
|||||||
|
P.O.BOX 1945 RUNNING SPRINGS,CALIFORNIA 92382 |
|||||||
|
EMAIL: vdl3@verizon.net PHONE : 909-744-4445 |
|||||||
|
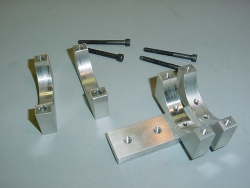
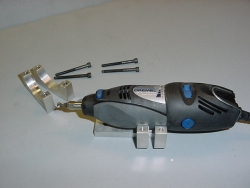
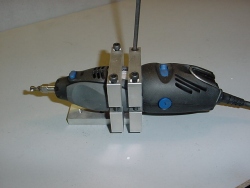
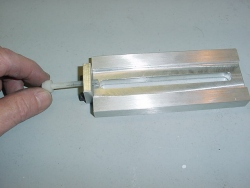
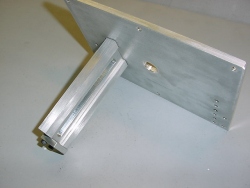
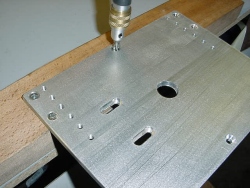
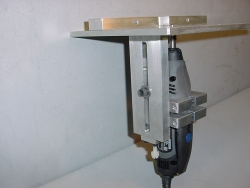
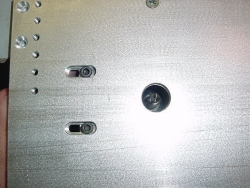
UNIQUE, ONE OF A KIND, HIGH QUALITY MODELING TOOLS MADE IN THE U.S.A. |
||
|
|
||
|
|
|||||||||||||||||||||||||||||||||||||||||||||||||||||||||||||||||||||||||||||||||||||||||||||||||||||||||||||||||||||||||||||||||||||||||||||||||||||||||||||||||||||||||||||||||||||||||||||||||||||||||||||||||||||||||||||||||||||||||||||||||||||||||||||||||||||||||||||||||||||||||||||||||||||||||||||||||||||||||||||||||||||||||||||||||||||||||||||||||||||||||||||||||||||||||||||||||||||||||||||||||||||||||||||||||||||||||||||||||||||||||||||||||||||||||||||||||||||||||||||||||||||||||||||||||||||||||||||||||||||||||||||||||||||||||||||||||||||||||||||||||||||||||||||||||||||||||||||||||||||||||||||||||||||||||||||||||||||||||||||||||||||||||||||||||||||||||||||||||||||||||||||||||||||||||||||||||||||||||||||||||||||||||||||||||||||||||||||||||||||||||||||||||||||||||||||||||||||||||||||||||||||||||||||||||||||||||||||||||||||||||||||||||||||||||||||||||||||||||||||||||||||||||||||||